This is one of my FAQs: How I grow my nails naturally so long, without having them break? Despite what some think, my nails are 100% natural and I've never had artificial nails like gels or acrylics. In this video I share my top tips on how to stop nail biting (reformed nail biter right here) and how to grow them to a nice long length using specific techniques and products.
Direct link to my video

31 Aug 2010
26 Aug 2010
Loose Sexy Curls Hairstyle

This look was inspired by the hair that is frequently worn by the Victoria's Secret Angels, sort of a long, loose tousled curl look. I wanted to try to re-create the style to the best of my abilities; here I'm using a 1.5 inch (38mm) barrel curling wand.
Try it out for yourself and let me know how it works out for you!
Products I used:
Garnier Fructis styling mousse, Wella hairspray, Sebastian Molding Mud
Link to the video here
18 Aug 2010
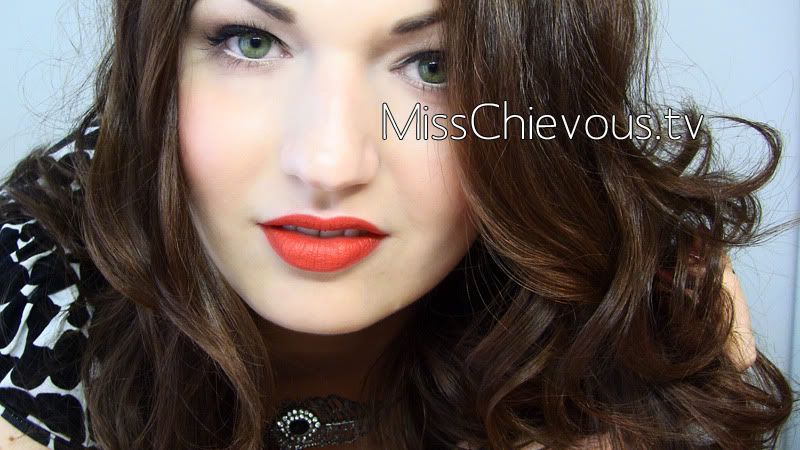
Rockabilly Pin-Up Makeup


This look was inspired by the 1950s vintage pin-up style, Rockabilly, and Dita Von Teese. I wanted to do a new spin on the classic pin-up look, by paring down the look a little bit and making it more simple to wear for everyday if that is your style. I also needed an excuse to wear MAC Lady Danger lipstick, a new surprising favorite. Who knew that an orange-toned tomato red color would actually suit me? It's a nice change from the blue based red lipsticks I would normally go for.
Face
Lancome Teint Idole foundation, MAC Studio Finish concealer
Cheek
MAC Stereo Rose MSF, Bobbi Brown Clementine blush
Eyes
NYX Jumbo Pencil in Milk, MAC eyeshadows in Solar White, Malt, Soft Brown and Vanilla, MAC Blacktrack Fluidline, Max Factor Natural Glaze eye kohl, Maybelline The Colossal mascara
Lips
MAC Redd lipliner, MAC Lady Danger lipstick
Link to the Video Tutorial
Models Own 50% off sale

Just a quick update to let you know that the cosmetic brand Models Own is going to be having a 50% off online sale when their Facebook page reaches 10,000 followers! Right now they're at about 8,700 so I'm going to try to help them get to 10,000 because I really want to get my hands on some of their nailpolishes which I've heard so much about. (I'm not affiliated with Models Own whatsoever.)

They do ship internationally, and with the sale the polish is going to cost £2.50 instead of £5 per bottle, so I'll definitely stock up! You can check out this page for lots more color swatches. Models Own also sells some makeup products on their website, but it's the polishes I'm most interested in.
So if you also want to take advantage of the upcoming sale, Like their page on Facebook. Click here to go there now. Once they hit 10,000 which should be soon, followers will get a discount code to use towards their purchase.
13 Aug 2010
MissChievous at Museum of Design, Zurich

I'm back from holidays in Canada and have some exciting news to share. Not only did I pass 200,000 subscribers during my absence - which is pretty awesome in its own right - but I will also be exhibiting some of my videos at the Museum of Design in Zurich for an upcoming installation called "Makeup - Designing Surfaces". I am enthralled at the opportunity, as it will be a great way to reach a completely different audience. It feels great to have my work recognized in the artistic world, and I hope it will be a huge success.
The exhibition will run from August 25, 2010 until January 2, 2011 at the Museum für Gestaltung in Zurich, during which time at least 5 of my videos will be displayed and running on a big screen. Here is a link to the museum if you would like more information.
This week has been very busy for me as I have had to re-film some of the videos for the exhibition on my new camera so that they can be in HD format, this has proven to be a huge amount of work but I hope it will be all worth it. The picture above is from my Fallen Angel tutorial, which I re-filmed today. I did a slightly different spin on the lips this time, and I like it better this way.
If you live in Switzerland or in the surrounding area (Germany, France, etc) and would like to attend the museum with myself, please leave a comment below. If there is enough interest, I may organize a meet & greet to meet with fans and subscribers in Zurich, possibly do a communal viewing of the exhibition and then have some time afterwards to have fun together. This will only happen if there is enough interest and nothing is formally planned yet!
You can also watch my latest video below for an update from myself, and thanking my viewers.
9 Aug 2010
Jungle Green Eyes


Eyes
NYX Teal eyeliner, NYX Serengeti Trio e/s (lightest lime green), MAC pigment in Golder's Green, MAC Humid e/s, MAC Carbon e/s, MAC Dazzlelight e/s, MAC Feline kohl pencil, mascara (forgot which one I used), random false lashes (forgot the brand)
Cheek
Clinique Shimmering Tones Powder in Peach Bronze
Lips
Rimmel Lipliner in Addiction, Barry M 147 Lipstick, random lipgloss from Margaret Astor
Nails
Illamasqua Rampage
22 Jul 2010
Best Apple Pie Ever

I love this apple pie recipe! It's versatile and can be adjusted for lots of different kinds of fruits. In this video I make an apple-nectarine pie, but I've also tried it with just apples, or apple-rhubarb, strawberry-rhubarb and apple-peach; all combinations were delicious! This recipe is perfect for using up various summer fruit.
Ingredients:
* In the video I used 5 apples and 5 nectarines, you can mix the fruit as you like.
- Melt butter in a sauce pan. Stir in flour to form a paste. Add white sugar, brown sugar and water; bring to a boil. Reduce temperature, and simmer 5 minutes.
- Meanwhile, place the bottom crust in your pan. Fill with apples, mounded slightly. (Optional: Cover with a lattice work of crust. I skipped this part because I don't like so much dough.) Evenly pour the sauce over the fruits, and the lattice crust if you made one.
- Bake for 15 minutes at 425 degrees F (220 degrees C). Reduce the temperature to 350 degrees F (175 degrees C), and continue baking for 35 to 45 minutes.
This pie is really simple to make, ready in no time at all, and is so delicious! Every time I make this I get nothing but compliments!
Link to the video tutorial
Link to the video tutorial
16 Jul 2010
China Glaze Vintage Vixen Swatches

Clockwise Thumb to Pinkie: Jitterbug, Midnight Mission, First Class Ticket, Emerald Fitzgerald, Bogie

Clockwise Thumb to Pinkie: Riveter Rouge, Foxy, Goin' My Way, Hey Doll, Ingrid

Top to Bottom: Classic Camel, Swing Baby
Here you can see all the nailpolishes swatched from the China Glaze Vintage Vixen collection for Fall 2010 - all without topcoat. At first when I heard these were mostly frost finishes, I was a bit skeptical, but in fact the finishes are pretty varied. Some have a very metallic, foil texture, while others have a more glass flecked finish. Riveter Rouge is a bit bumpy so you would need a good topcoat to smooth it out, and Goin' My Way and Hey Doll were a bit on the runny side. But other than that, the formula of these is really good. Definitely check out the collection in nail salons, beauty supply stores, or online retailers because there are some great colors in here for fall.
Watch my video review on Youtube
Watch my video review on Youtube
15 Jul 2010
Vacation Time + Upcoming Videos

Just letting you know that I'm going on holidays for 3 weeks to Vancouver on Saturday with my boyfriend, and I can't wait! I'm really looking forward to having some time off, and doing some traveling. We'll be going on a road- and camping trip to Vancouver Island as well, which is an absolutely beautiful part of Canada, and maybe even up to Whistler for a few days. Summer is definitely my favorite season to be in Vancouver because of the great weather and plethora of activities: biking, swimming, kiting, picnicking, hiking, camping, etc.
This means I'll be away from Youtube for 3 weeks, BUT I have pre-recorded lots of videos to upload during my holidays. (Not looking forward to uploading from my parent's slow Internet connection though, oy!)
Here's a list of upcoming videos, in random order:
Lime Crime Lipstick review
China Glaze Vintage Vixen Polish Overview
Soft, Wearable Colors for Summer Makeup Tutorial
Makeup Tutorial in German language
5 Minute Summer Updo Hair Tutorial
Cirque du Soleil Makeup Tutorial
My first cooking tutorial!
So fret not, there's bound to be something for everyone, and you'll be sure to get your "MissChievous fix" in those 3 weeks. (Not like you can't live without my videos, but you know what I mean, haha!) Now I still have to run some last minute errands, buy some gifts for family and friends, wash laundry and pack. Our flight is very early Saturday morning, so we'll probably have to get up at 5am or some inhuman hour.
OK so that's it, I'm off! See you soon :)
You can also follow me on Twitter and Facebook for updates and pictures during my time on holiday.
12 Jul 2010
Purple Naughty Eyes


I saw the following editorial pic on MAC's website, for their Naughty Lash collection, and I just thought it was sooo pretty and dramatic, so I decided to do my own version. Here is the MAC picture:

Well, mine is a bit different but I have no idea what that picture actually looked like before photoshoping and what products were used, so I just took a guess. I also changed the brows a bit because they were too drag queen-ish for my taste. Not an everyday look by any means, but why wear "everyday" makeup every day? :p
Face & Cheek
Revlon Photo Ready and Colorstay foundation both in Ivory, La Femme Lilac Champagne blush, Illamasqua Intrigue blush
Eyes
MAC Bare Canvas Paint, Ben Nye Cosmic Violet, Makeup Forever Nr. 92 , MAC Carbon, NYX White, Essence Black Mania kohl pencil, MAC Blacktrack Fluidline, lashes from ebay (generic brand), cosmetic glitter, Ben Nye Glitter Glue
Brows
MAC Brows in Spiked, MAC Carbon
Lips
Illamasqua Intense Lipgloss in Absorb
Link to the video tutorial on Youtube
8 Jul 2010
My Makeup Collection
After so many requests on Facebook, I decided to film an updated makeup collection and storage ideas videos. I'm really happy with my current set-up, so hopefully this will give you some ideas on how to create your own beauty space! I realize a lot of this stuff is from IKEA, but even places like Office Depot, Target and Walmart might have some good storage solutions.
I don't go crazy with buying too much makeup anymore, but I like to add new pieces now and then that will further my variety. So I won't buy my 10th nude color lipstick, but rather now I'd buy stuff that is very unique and I don't already have a similar product.
Link to the video.
I don't go crazy with buying too much makeup anymore, but I like to add new pieces now and then that will further my variety. So I won't buy my 10th nude color lipstick, but rather now I'd buy stuff that is very unique and I don't already have a similar product.
Link to the video.
4 Jul 2010
Eyeko Nailpolishes
Today I've got some Eyeko nailpolishes that were sent to me for review, so I gave them a whirl and also swatched the colors for you on my hand. Picture first, thoughts later!

Clockwise from thumb to pinkie: Eyeko polishes in Coral, Tea Rose, Posh, Vampira, Petite
My favorite from this collection is definitely Coral, it's such a bright, eye-popping shade, just the right blend of coral and red. I've seen swatch comparisons and it's a lot like MAC Scorcher nailpolish from the recent To The Beach collection, maybe a tinge less red and more coral. I've worn this several times as a manicure already and it also would look great on toes for the summer. I really do love this one!
Posh reminds me a lot of Sephora by OPI Metro Chic, it's in that mushroom taupe vein with a grey and brown undertone.
Vampira, which is hard to capture, is a black polish with lots of red glitter and shimmer inside. It didn't photograph so well on here, but it's in the same vein as China Glaze Lubu Heels.
Tea Rose is a slightly dusty pink-mauve shade, and Petite is a sheer light milky pink, great for French manicures. They were my least favorite of the bunch as these aren't the type of polishes I usually go for and I didn't find them unique or original in the slightest.
As for the quality, all except the sheer one were completely opaque in two coats with no visible nail line whatsoever. The texture is a bit on the thick side; they sort of remind me of Essie polishes but not streaky at all. The thing I didn't like so much is the inconsistency in the brushes, some had loose ends that make it hard to make a very neat application. But all in all, the quality was acceptable, even good.
Aside from Coral, I have to admit that I wasn't wowed in the originality department. While these are pretty shades, I feel like I've seen all of the colors before from other brands and they are easily duped, even with drugstore nailpolishes such as Barry M, Models Own, Sally Hansen, etc. I would be interested to see if Eyeko comes up with some more unique shades, instead of just following the current top nailpolish trends, to set themselves apart from other brands. Don't get me wrong, I like some of the colors, but I don't know how often I'll be reaching for these over more unique shades and finishes I have in my polish collection. Not exactly OMG-I-HAVE-TO-HAVE-IT colors, if you know what I mean, but nice nonetheless, and cute packaging if that's something you like.
These retail for £3.50 each for 8.5ml of product and are available at eyeko.com
Link to my video review
2 Jul 2010
DIY: Hair Extension Storage
Ever since I acquired some new hair extensions (review to come soon) I've been trying to figure out a way to store them in between use so they don't get all tangled. I didn't like the idea of laying them out in a drawer, or folding or tying them up somewhere, so I decided to make a DIY hair extension holder out of a coat hanger!
To do this you will need an enclosed coat hanger, some sturdy string, and scissors. Tie the string on one end of the hanger, and then wrap it multiple times around the hanger. At each end, wrap once around the hanger to make sure the strings stay in place and don't just slip off. Then when you have a few layers of the string, tie the end with a few knots and cut it off. This way each piece of the extension will have its own space, you won't have to clip multiple wefts onto one string.
And voila! Extension hanger extraordinaire! You could even cover this with a duster bag, the kind you get at the dry cleaners, but I don't have one.


30 Jun 2010
Jane Volturi Makeup from Twilight Eclipse


So Twilight Eclipse is opening today (June 30th) in theaters, so to honor the occasion I thought I'd do a thematic makeup tutorial. I decided to emulate the Volturi vampire makeup, notably that of Jane. She is a sadistic vampire with special mental powers, who belongs to the Volturi clan. There's going to be a lot of Volturi storyline in Eclipse, so I thought this would be perfect!
Her look is actually quite simple, with very flat, ultra pale skin without any contouring, a rounded monochromatic smokey eye, and pale matte lips. I tried to copy the look as best as I could, all I had at my disposal were the preview clips from trailers I watched on Youtube. I can't wait to see the movie, but I think I'll wait a while until the hype dies down a bit to go to the cinema. I watched New Moon with my mom and she loved it, so maybe I'll wait til I'm in Vancouver to watch this one with her!
Enjoy the video below!
Enjoy the video below!
Face
Dinair Airbrush foundation (more info to come soon), Illamasqua Intrique blush (matte white, used as setting powder)
Eyes
Urban Decay Primer Potion, MAC e/s in Copperplate, Carbon, Print, Ben Nye Toast e/s, MAC Feline kohl pencil, Essence Long Lasting pencil (black), Covergirl Lashblast mascara
Lips
MAC Studio Finish concealer, L'Oreal Sheer Nude lipstick Nr. 466, NYX Perfect lipstick
29 Jun 2010
A heartfelt message
I was deeply touched by this message I received by one of my subscribers, so much that I asked her permission to share it with you on my blog.
Thank you Dina for your wonderful message, it means so much to me. Some days I cannot believe how my make-up videos are able to reach so many people on so many different levels. You can check out Dina's new Youtube channel by clicking here and supporting this wonderful lady.
Hi Julia,
If you have a couple of minutes to spare, I thought it would be nice to thank you for what you have given me. It's kind of a long story, so I'll try to sum up quickly.
Two years ago I had just finished university, I was on the provincial cycling team and attending national champs, and was in a relationship with a lovely, warm-hearted man. Then, about a year ago, (probably from my multiple bike crashes) I had a very painful back injury that left me mostly in bed and unable to do anything. Now, 15 months later, im still in bed, still in a LOT of pain, and still unable to do anything. I had to quit my job because i couldnt physically do it; I was unable to attend nationals or even ride recreationally. :(
Anyway, with all this time spent in bed I tried to reconnect with my old hobby of painting portraits. I've always loved painting and hadn't done it since I started university. But being away from it for so long I was unable to reconnect. Then one day I stumbled on one of your videos and I was instantly hooked! I watched all of your videos. I love them. The next thing I knew I was on ebay ordering a bunch of makeup supplies and I'm now "painting" faces instead of portraits (well, my face only). You have no idea how much of a stress relief this has been for me. It's brought back a lot of joy into my life, and I owe a lot of that inspiration to you. So I wanted to say thank you. I really wish you will continue doing your videos or whatever inspires you because, whether you know it or not, you have had a positive impact in my life and probably others too.
I even made a video and sent it to my mom and sisters (who live overseas). They liked it and convinced me to make a youtube video. So on the days that I was feeling better, I made a couple of videos and uploaded them. I haven't had many views but that doesn't really matter :)
Anyway, I hope one day we can meet (i live in Canada) so that I can thank you in person. I wish you all the best in your life adventures.
Cheers :)
Dina
Thank you Dina for your wonderful message, it means so much to me. Some days I cannot believe how my make-up videos are able to reach so many people on so many different levels. You can check out Dina's new Youtube channel by clicking here and supporting this wonderful lady.
26 Jun 2010
When worlds "Collide"...

...then the impact will surely be lit up in neon pink fabulousness! This is Illamasqua Collide nailpolish. It's hard to capture how incredibly bright and glowing this color is, I'd describe it as a neon pink without any blue undertones. I wore this in my last video announcing the contest winner and a little personal ramble, and had a lot of comments on it. I'm not surprised, this nailpolish is hot, hot, HOT! Love it for summer. This is on the third day of wear and as you can see there is very little wear and tear. Love Illamasqua polishes!

I also took the time to wash some of my makeup brushes and they are currently lying (laying?) out to dry on my balcony table. I'm using the Brush Guards here in case you're wondering what that mesh stuff is, I absolutely swear by them for brush drying. Puts them back into perfect shape! I always get excited when my brushes are clean, makes me want to use them right away and film a makeup video.
Hope you are all having a fabulous weekend and enjoying the sunshine! (If you have sunshine that is...)
14 Jun 2010
Kim Kardashian Bronze Makeup


This look was inspired by a picture I saw of Kim on her makeup-artist's website, Mario Dedivanovic, where he styled her for a red carpet event. He also provided step by step instructions of the look, so using those instructions, I decided to try ma hand at it. The result is a very wearable, bronze eye that I think is perfect for summer, not too overdone, and could even be amped up with some false lashes for an evening look.
Eyes
MAC Untitled Paint, MAC Bronze CCB, MAC shadows in Bronze, Malt, Vanilla, Solar White, MAC Feline kohl pencil, Max Factor Natural Glaze pencil, Lancome concealer, Maybelline The Colossal mascara
Face & Cheeks
Makeup Forever Mat Velvet+ foundation 15, Barry M Natural Dazzle bronzer, MAC Solar White e/s
Lips
Gosh Darling lipstick, MAC Prrr lipglass
Link to the video
12 Jun 2010
Icy Blue Green Nails

I've worn this nailpolish combo in two of my videos and always get loads of comments on it from people wanting to know what it is. I'm not surprised, this combo is one of my favorites! (By the way, I always list the nailpolish I wear in the info box below the video.)
This is two layers of Sally Hansen Insta-Dri in Jumpin' Jade and one coat of CND Effects in Ice Blue Shimmer #555 and one layer of Seche Vite topcoat. I love the CND Effects polish in this particular shade, it's almost colorless but gives a pearlescent turquoise blue icy shimmer when layered on top of any color. I've also done this combo using Barry M Racing Green polish as a base color and it worked really well too.
I have one other CND Effects polish with a gold flake in it, but I like this one so much better! If you're not sure where to buy the CND Effects polishes, check out their website to locate a retailer near you.
9 Jun 2010
Beautiful Summer pallor
You know what I really hate? That as soon as summer comes along, the big fashion "must" is to get instantly tan and bronzed...and if you have pale skin, better hit the tanning salon or start fake baking. I truly think this trend is strongly influenced by the many beauty companies that have created a multi-billion dollar industry selling tanning products, self-tanners, bronzers, and the like. Ads in magazines showing perfectly bronzed beauties, supposedly lying on a yacht all day in the French Riviera sipping champagne and celebrating parties later to be seen on Girls Gone Wild, make us paler girls and boys feel rather alienesque. Fair skin is on the "out" lists and women are advised to hop to it and do something about that horrible, sickly, white skin.

Enter the many beauty companies selling us fake tanners, makeup collections featuring lots of bronzers, and all-inclusive packages to tanning salons where we throw our skin's health to the wind and say hello to skin pigmentation spots, premature aging, wrinkles, or even cancer, all to be that enviable tanned beauty in a beautiful summer bikini.

Now some may call me a hypocrite as I once bought a package at a tanning salon myself when I lived in Montreal and the winter bleakness was getting to me. I can't deny that I got some sort of satisfaction being tan and feeling summery as I lay in the bed, roasting my skin. I have, however, learned from my mistakes, and after that one forray into tanning, I soon realized that having a tan wasn't worth the damage to my skin.
On the endless quest to be tan, I decided to broaden my horizons into self-tanners, and tried everything from low end to high end. The results varied, some better and some worse, but in the end I always ended up looking more orange or yellow than my natural tan color, because my base color was so white. I have seen some self-tanners look ok on those who already have darker or olive complexions, but on really white skin, I never had a good result. And then there's the smell too! No matter how much perfume there was in those things, they always had a horrible, faint undertone that just was disgusting.
And let's not forget the horrible oompa loompa syndrome!


Far from attractive.
A few years ago I decided enough was enough and just threw away all my self-tanners and decided natural was miles better than anything smelly out of a bottle could provide. I slather on the SPF now when I go to the pool, knowing that I'll still look years younger than my tanorexic counterparts when they hit 40. So what if my legs aren't baked bronze when I wear shorts? This is the skin I was born with - it's fair, sensitive to UV light, and doesn't tan easily nor hold a tan well. And you know what? That's ok. I'm content with using just a smidgen of bronzer on my cheeks when I feel like, making sure not to overdo it, and I'll get a tan naturally by spending time outdoors in the summer doing activities. I'm not going to ruin my skin by baking in the full sun for hours just so that I look "healthy". I'm not going to waste my money anymore on expensive self-tanners or tanning salons because other people expect it, or tell me I "need to get a tan." And yes, I have been told this frequently by ignorant gits! So go pale this summer; you'll be in good company! ;)

Bridget Regan, actress from Legend of the Seeker

Liv Tyler

Anne Hathaway

Dita Von Teese

Dakota Fanning
3 Jun 2010
Alfred Hitchcock's The Birds nails


These nails were inspired by one of my favorite nail blogs, The Daily Nail, and show an Alfred Hitchcock design from his famous 1963 movie "The Birds". You know that creepy scene where the kids are running out of the schoolyard and the black crows attack? Yeah, these nails kind of remind me of that scene.

And since some people may not be familiar with Hitchcock's films this is the profile image which is often seen during the credits.

I hope you enjoy it and try out this nail design. All you need is white and black polish, some brushes, and some time on your hands...literally!
Video Link
Subscribe to:
Posts (Atom)