29 Jul 2009

Makeup Removal and exfoliation: Imagem System


I thought it might be time to do another updated video on skincare and realized it's something I should probably address more frequently, as I get a lot of questions about that on my Youtube channel. Instead of doing one long video on all products I use, I thought I would intersperse the videos every now and then, with product recommendations, tips or home remedy masks!

Today I wanted to do a mini review on the Imagem cleanser and Custom Exfoliation bundle. I have been using these products in combination for about a month now or more and have had a really good response.

The cleanser is a low-foaming cleanser and does not contain Sodium Laureth Sulphate or Sodium Lauryl Sulphate, inexpensive foaming detergents that are often added to personal care products like face wash, soap, shampoo, etc. They are also what is categorized as surfactants, wetting agents that lower the surface tension of a liquid, allowing easier spreading, and lower the interfacial tension between two liquids. Sodium Lauryl Sulphate is a known skin irritant that can cause severe drying of the skin, and while Sodium Laureth Sulphate is much milder, some people with very sensitive skin might still find the ingredient to be too harsh and irritating.

This cleanser does not contain either ingredient, but contains many plant extracts such as aloe, cucumber, chamomile, rosemary, lavender, arnica flower, green tea leaf and fruit extracts. I find this cleanser to be very mild on the skin, but excellent at removing makeup without drying out my skin. The Custom Exfoliator can be blended together with the cleanser to remove dead skin cells, and contains just 3 ingredients: walnut and sweet almond shell granules and aloe vera powder.

Please note the picture above is not indicative of the size: The Custom Exfoliator contains 30g / 1 oz. of product, the cleanser contains 237ml / 8 fl. oz. of product.

Nonetheless, I really love this bundle and will continue to use it. The cleanser is very concentrated, meaning you only need 1/2 to 1 pump to wash your entire face. The exfoliator should not be used on a daily basis, 1-2 times a week should be enough.

Both are available here:
Price: $39.95


Link to my video

25 Jul 2009

Halloween 2009 - Requests!


In preparation for Halloween 2009, I've already begun filming Halloween makeup tutorials. My Halloween videos were a huge hit last year; some of them are still my most viewed videos to date. This year I want to make even more! As they take a lot of time to film and prepare, I've started filming them now, and will begin uploading them starting sometime around the end of September and throughout the month of October. This means that if you want to make a request for a particular Halloween look you'd like to see - NOW IS THE TIME! :)


How to make a request:

I've decided to make things a bit more interactive this year. So, I'm asking my viewers to make a video response to this Halloween request video (click for the link) with their ideas. I will only be considering requests from these video responses. This is to make things a bit more fun, to help me get ideas from you all, and to also motivate me to film lots and lots of Halloween looks this year! My Halloween looks are usually very elaborate and take a lot of time to film and edit, so your input will definitely help me along.

Your video could include a slideshow of inspirational pictures of Halloween looks you find online, or you can just talk into the camera with your idea. If you don't have a camera, just make a picture slideshow and add text. You don't absolutely have to film yourself if you're not comfortable with that. (Although visuals of your ideas help me a lot.) I can't promise to do every request of course, but I will be looking through all the response videos to get ideas!

Anyone can make a video! I use Windows Movie Maker which comes installed with all PCs, or you can use iMovie if you're on a Mac. Both programs are free and already installed on your computer, and are easy to use, so there's really no excuse. ;) You can also make a slideshow video really easily at onetruemedia.com it's pretty much foolproof. Happy requesting!

Just to refresh your memory, here are some of my Halloween makeup looks from last year. I also have a Playlist on my Youtube channel for these looks, so make sure you don't request a look that I already did, or that is really similar to one of my other video.


Tim Burton's Corpse Bride
Witch
Princess/Fairy

Ladybug

Vampire

Ventriloquist Doll
Mother Earth

23 Jul 2009

Sydney Morning Herald feature

Thanks to a viewer, Janet, for emailing me a link of this short news feature in the Sydney Morning Herald. It's a short video featuring myself and some other Youtube beauty videographers, talking about the popularity of online makeup videos. Here is the link:

Click to watch

They have used a clip of my Haifa Wehbe video tutorial in the news story, as well as some clips of other popular videos from other users. Kind of cool, but what's with the utterly judgemental tone of the journalist? "Let's hope we don't all walk around looking like this!" My god lady, lighten up! Sounds like a classic line coming from someone who probably ascribes to the Bobbi Brown makeup philosophy. Yeeesh!

Also, this article is really too short to shed light on really anything of substance - watching that video makes me really wonder about the journalistic capability of the reporter. What on earth was the point of that video? The gist I understood was, makeup videos are popular and sometimes the person will hold up a camera to the lens. Wow. Thanks for the enlightenment and your profound understanding of the online makeup community! Good job, mainstream media.

What do you think?

21 Jul 2009

Apple Daily: Hong Kong newspaper feature


Thank you so much to one of my subscribers, Pui, for sending me a scan of this! I never would have known otherwise that yours truly and some other Youtubers were featured in Apple Daily, which is apparently a Hong Kong newspaper! (Bottom right, click to enlarge.)

Unfortunately, I am unable to read what it says, nor do I know what issue this is from. If anyone can read this or could tell me how to get in contact with Apple Daily newspaper to request a copy of this issue - PLEASE LET ME KNOW! Unfortunately the website is all in Chinese as well so I can't read much, even using Google Translator. I would love to get a copy of this issue so if you have any more information, please email me: julia.youtube@gmail.com

I believe this is the publisher of Apple Daily: http://hk.nextmedia.com/

Thankful for any help...

Update: Thanks to Chelsea Yu for a rough translation.

DIY exaggerated colourful makeup

No.5 Miss Chievous

Advantage: she is good at exaggerated makeup, if anyone want to learn Halloween makeup; she has a series of Halloween makeup videos, and can be a very valuable and useful resource.

19 Jul 2009

Ask Me Beauty: My eye are runny and cause smudging

Whenever I put any eyeliner or shadow right around the outer corners of my eyes, it never lasts. My eyes water a lot or I just blink a lot and the colour ends up coming off and looking terrible. Any suggestions on making the colour stay?

Dear Victoria,

Unfortunately there is no 100% foolproof method for preventing smudging, especially where watery eyes are concerned. But here are tips on how you can reduce it.

First, using a good eyeshadow base is the most important part. I really like Urban Decay Primer Potion because it lasts really long and prevents creasing. But in some cases, even this might not be waterproof enough for some people. Another method you could use is using either a gel eyeliner such as the MAC Fluidline or any other brand as a base, because gel eyeliners are really long lasting and don't easily come off with just water. You could also use a waterproof or water resistant eyeliner pencil and smudge that as a base. Even if some of the eyeshadow comes off a little bit after hours of extended wear, the base will help it last longer. The MAC Liquidlast liners also stay on forever. Switch to using a waterproof mascara if your mascara tends to run, and avoid kohl and soft pencils as eyeliners, I prefer gel eyeliners for this reason. You will have to use an oil-based eye makeup remover to take these products off at the end of the day.

The other thing you want to consider is what is causing using your eyes to water in the first place. Reducing the culprit might be better than just treating the symptoms. Your eyes might be watering due to allergies, maybe it's a product you're reacting too, or other agents such as pet dander, smoke, pollen, etc. Try to eliminate any agents that are causing runny, water eyes in the first place, or treat allergies with an anti-histamine.

Another common issue is skin dryness. I have noticed this on myself, if I use an eye cream, especially on the outer corners and let that sink in before applying makeup, it somehow reduces the watering.

Lastly, if your eyes are watering, it could be a natural way for your eye to cleanse itself of foreign bodies that have entered the eye socket - for example shadow fall-out during application, or product on the waterline. Be really careful not to get eyeshadow fallout into the eye during application, and skip using makeup products on the tightline and waterline all together if you have sensitive eyes. It might be irritating your eyes and they are trying to "wash away" the products naturally by producing tears. An easy trick I do is after I finish my eye makeup, I use a Q-tip moistened with my own saliva (sounds gross but only do this on yourself, your saliva contains natural anti-septics and because it's a natural fluid, it will not irritate your eyes at all, unlike makeup remover) and run it along the inner parts of my eye to remove any product fallout, especially on the waterline, tearduct and outer corners. You'll be amazed at the product gunk that sometimes comes out, and this really reduces the tear production of my eyes. If I notice watering during application, I use a dry Q-tip and just hold it in the place of the seepage to absorb the "eye juice", it prevents smudging of the makeup.

Unfortunately there's no 100% guaranteed way to prevent runniness of the eyes. If you have naturally water eyes, it's likely that even with all these tips, your makeup might need a few touch ups during the day, but hopefully these tips will help to improve your situation a little bit.

If you have a beauty related question and need advice, please email your question to askmebeauty@gmail.com The best questions will be published on my blog, your anonymity is guaranteed.

17 Jul 2009

Teen Week: Easy, Flirty Evening Look


The goal of this look was to create a really simple but effective smokey eye that isn't too dark and dramatic, and that is easy to achieve using just 2 eyeshadows and a minimal set of basic eye brushes. I know many teens do not have a large makeup collection and just have the basics when getting started, so I wanted to show that even with some basic skills and products, it's still possible to achieve a nice smokey eye look. This look would be perfect for going out in the evening with friends to a movie, or on a date! I hope you enjoy the final installment in my teen makeup series!
Face
Illamasqua cream foundation, Barry M Bronzer
Eyes
ArtDeco e/s base, shimmery taupe grey e/s from the 120 palette from ebay, NYX Aloha e/s, Ben Nye black eyeliner, L'Oreal Voluminous mascara
Lips
NYX Strawberry Milk lipstick, MAC Prrr Lipglass

Nailpolish
Guppy - Nr. 77 (available for purchase on ebay)

Ring
H and M

Video Link

15 Jul 2009

Teen Week: Preppy School Look


This look was loosely inspired by the character Blair Waldorf from the hit TV show Gossip Girl, although I kind of changed the colours up a bit to suit my taste. I was going for a very girly prep school look, one that would be easy to recreate and wearable for school or other daytime activities. Although I use 2 palettes for this look, you don't necessarily need to buy the whole palette. For the eyeshadows, you'll need a pastel pink, a light brown, a dark brown, and a highlight color - easy to find pretty much anywhere! I round out the video by making some budget makeup brushes suggestions and where to buy. Make sure to check back on Friday for my final look in this teen series.

Face
Illamasqua cream foundation, Bobbi Brown Pot Rouge in Pink Raspberry, MAC MSF in Blonde
Eyes
Urban Decay Primer Potion, NYX Jumbo Eye Pencil in Milk, 42-Double Stack Palettes from ebay (both the matte and shimmer), MAC Dazzlelight e/s, Quo eyeliner in Brown, Illamasqua Medium Pencil in Cane, L'Oreal Voluminous mascara
Lips
NYX Tinted Lip Spa in Sake, Margaret Astor lipgloss (doesn't have the shade written on package)
Nails
Sorry I really don't remember which one I used!

Link to video

13 Jul 2009

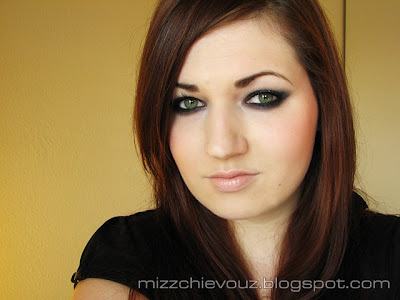
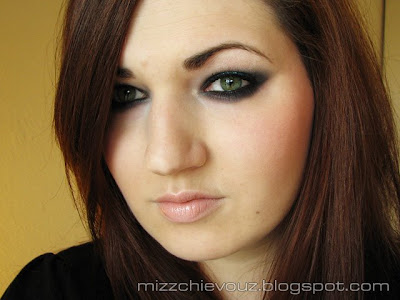
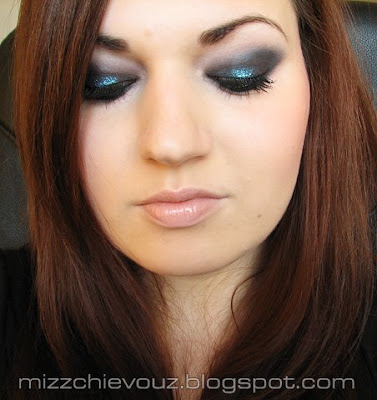
Teen Week: Emo Makeup


I'm so excited to be launching TEEN WEEK on my Youtube channel with a much requested look: Emo makeup! This entire week will be focusing on makeup videos specifically geared towards my teen viewers. Even if you're no longer a teen, I hope that at least some of the looks might still appeal to you. These looks are especially appropriate for beginners or for those who do not have a lot of products and brushes to work with. Although I use some high end brands, I make specific recommendations for budget or drugstore alternatives. In the next video this coming Wednesday, I'll be featuring my next teen look, as well as make some great budget makeup brushes recommendations so make sure to tune in again!


Face
Illamasqua cream foundation, NYX Angel blush
Eyes
ArtDeco e/s base, Ben Nye black eyeliner pencil, MAC Carbon e/s, Ben Nye Greystone e/s, MAC Reflects Transparent Teal Glitter, L'Oreal Voluminous mascara
Lips
FaceFront Stunt Double concealer, NYX Smokey Look lipgloss
Nails
Barry M - Cyan Blue

9 Jul 2009

Guppy Nailpolishes Swatched

These are swatches of the Korean brand "Guppy" nailpolishes that I wrote about in a previous entry. These are all the colors I own so far. If you would like to buy any of these yourself, click here for the shop on eBay although I'm not sure if all these colors are available yet, so check back later if not.

Thumb: #14, Index: #08, Middle: #20, Ring: #16, Pinkie: #33

(closeup) Left: #16, Right: #33


Thumb: #25, Index: #38, Middle: #18, Ring: #29, Pinkie: #77


(Closeup, clockwise) Thumb: #25, Index: #38, Middle: #18

Full manicure with #29


Full manicure with #77 (reposted)

Nr. 8 was the only problem child that looked very different on the nails than in the bottle, I was hoping it would be a much darker, deeper vampy red shade but even after 3 coats it just wasn't as opaque as in the bottle. Nr. 29 was opaque in two coats, but I added a third coat in the full manicure picture for depth of color. All the other shades were perfect in two coats, even the nude shades. At first I thought that Nr. 25, 38 and 18 all looked pretty similar in the bottles but when swatched, you can see that none are really dupes of the others. Nr. 25 even reminds me a bit of pictures I have seen of Orly Country Club Khaki. All of these except Nr. 77 which is a shimmer, are cream finish.

My personal favorites from the colors I own so far are Nr. 77, 29, 25, and 33. Overall like I have said before, I am really impressed with the quality of these nailpolishes, the smoothness of application and the brush itself!

8 Jul 2009

GHD IV Styler Demo and Promo Code

I've had the opportunity to test out the GHD IV Styler (Dark limited edition) from Beautychoice.com and I have to say this has totally changed my feelings on straightening my hair. I used to hate doing it because it was so time consuming with my old iron, it would snag and pull, and I'd have to go every section a million times before it was really poker straight. Since I've started using the GHD about 3 weeks ago it is so much easier and takes much less time. While this is indeed a pricey straightening iron, I have to say that I think it is definitely worth the cost if you are someone who uses a straightening iron frequently as the results are amazing, and this iron could also be used for waving or curling your hair. The fact that it's also universal voltage makes it especially appealing to anyone who travels, since you won't have to purchase a special traveling iron if you go abroad.

(Just an FYI, heat tools will not work with a simple plug adapter in a country with a different voltage - it can actually break your iron. Take it from someone who has even bought a voltage converter for a North American hair straightener, only to have the converter melt!)

Right now BeautyChoice is having a promotional offer to pass on to my viewers. With the purchase of any GHD flat iron you will get a FREE Le Angelique Curling 13/25mm inverted cone iron. These are very similar to the Enzo Milano curling irons (I have the 1" and love it and use it a lot!) This one normally retails for $99.95 USD on their website. Use the coupon code TWIST and get the Angelique Curling iron for free with your GHD.

I hope you enjoy this promotional offer! This is a really great bargain for two amazing tools.

Click here if you would like to buy the GHD iron for youself and make sure to use the promo code TWIST at check-out to get the Angelique curling iron for free! You can also click here to check out the same model in white.

Click here to check out the Le Angelique iron for more details

Update: I called the official USA GHD head office to verify that the US versions of the GHD styler do not have the Holograms but come with a reset button on the plug, only the European GHDs have the Holograms. The US version (as sold on BeautyChoice) come with a Datecode on the actual styler. Once you receive your styler make sure to register it here. The US versions will have the North American plugs but can also be used in Europe or elsewhere with a simple plug adaptor. As there are many counterfeit GHDs out there, make sure to purchase your GHD from an approved retailer.

Nailpolish: Illamasqua - DWS

Video Link

7 Jul 2009

NOTD: Guppy Nr. 77


Sarah sent me some of these Korean brand nail polishes to try out that she found in a local shop. Having never heard of this brand, I was really excited to get to sample these. I have tried out 3 different shades so far of the various colours she sent me, and I have to say - so far I am really, really impressed by them!

Formula wise - dare I say it - they are comparable to OPI and go on very smoothly and are opaque in 2 coats, even the nude shades. I noticed absolutely no bubbling or streaking, and best of all, they have a brush similar to OPI's pro-wide brush - flat and wide and perfect for applying. I have to admit I like the formula of this brand better than Gosh and China Glaze, to make some popular brand comparisons. I am honestly utterly amazed at the quality, considering these only cost $2.50 USD in her shop! Right now she only has a few shades listed, but I hope she will add more, these are really great nail polishes at a bargain price.

I'll try to get swatches up soon of the other colors Sarah sent me so you can have an idea of the shade variety. Nr. 77 is a shimmery olive golden green shade. You can check out the other shades she is selling by clicking here. I know she has many other colors of these available so I am hoping she will add more soon, as these polishes are absolutely wonderful!

By the way, I cut and filed off my entire long nails this evening. Look at my cute nubbins! It's so odd to be typing with short nails again. I was just getting a bit tired of my long talons and constantly scratching myself by accident - they'll grow back eventually!

6 Jul 2009

Wedding Weekend


This past weekend I attended a wedding of some very close friends in France. It was very hot but gorgeous weather, and I'd been dress hunting for a while until I found this outfit. Sorry for the horrible cropping but my boyfriend did not want to be published on my blog. The necklace and earrings are Swarovski, a gift from my boyfriend for Christmas a few years ago. Dress and clutch are from a department store in Switzerland, and the white shawl was a gift from my boyfriend's mother a few years back; it has some beading on the ends.

I wish I could have gotten a better FOTD shot of my makeup and my hair, but time was pressing so I just didn't have time before we had to rush off to the Church for the ceremony. It was a rather amusing ceremony as the priest seemed almost drunk, the reception offered lots of delicious hors d'oeuvres and drinks, followed by a sit-down dinner for 120 or so guests followed by live music, dancing, and copious amounts of alcohol. Was all good fun but I'd never want such an elaborate, huge wedding for myself. I would prefer to keep it more low-key and simple.

The beautiful bride and groom (Stephan and Emeline)

The next day we all had a bit of a hangover from the alcohol but there was a luncheon to attend, where we stuffed ourselves again with Alsacienne food and more wine! Finally at around 4pm we started our drive home, by dinner time we were back home in Switzerland. It was really fun and I can't wait to see the pro photos from their wedding photographer soon.

3 Jul 2009

Lip Products Re-Organized

My vanity table is starting to reach its maximum capacity in products; it's becoming difficult to find things. Today I reorganized my lipstick tray so that I can actually see the products easily without having to rummage through finding a particular lipstick or gloss. I hated doing that!! I basically switched around the trays I was using for holding blushes and lipsticks, then jammed the lipsticks in with the labels up so I can easily read the shades and brand.

I've organized the lipsticks by brand, starting on the left and working over to the right: MAC, Nars, Illamasqua, NYX, Rimmel, L'Oreal, Barry M. Then lipglosses from MAC, Kiko Milano, NYX, Obsessive Compulsive, and Gosh.

SO much better this way! And it's made me realize I still have quite a bit of room for additional lip products on the right side, where I currently am housing a Bobbi Brown Shimmerbrick and some blushers to jam up space so the lip products stand upright. Hah!

How do you store your lip products? Do you have to rummage through a drawer trying to find the shade you're looking for, or are you able to locate them easily using a similar setup as myself?

1 Jul 2009

Illamasqua Spring/Summer 09 Editorial Look


This is the Illamasqua spring/summer 09 promo picture I used as inspiration for this look, using mostly Illamasqua products. I'm not sure if it turned out exactly like the picture, and since my own pictures turned out quite awful as I had less-than-ideal light conditions, I hope I somewhat did it justice! The colors in my video look a little bit different, although that might be the photography.

This is obviously a more artistic, extravagant, editorial type of look but if you like the colors, it can be toned down to be more wearable. Blush can be placed more traditionally on the apples of cheeks, the long eyelashes can be left off all together or substituted for something less dramatic, and you could also wear a very neutral lip color with it from Illamasqua. I hope you enjoy this video!


Face
Illamasqua Cream Foundation CF135, Illamasqua Blush in Chased and Intrigue

Eyes
MAC Paint in Untitled, Illamasqua Pure Pigment in Marvel, Illamasqua e/s in Cry, Raptur, Maybe, and Slink, Makeup Forever e/s in Nr. 92, Illamasqua Volume mascara, Illamasqua Nr. 10 False Eyelashes, Duo Lash Adhesive, Eye Brow Cake in Gaze

Lips
Illamasqua Lipstick in Fetish, Illamasqua Intense Lipgloss in Fierce

Nails
Barry M - Cyan Blue

For Illamasqua product pictures, please click here.

Link to Video